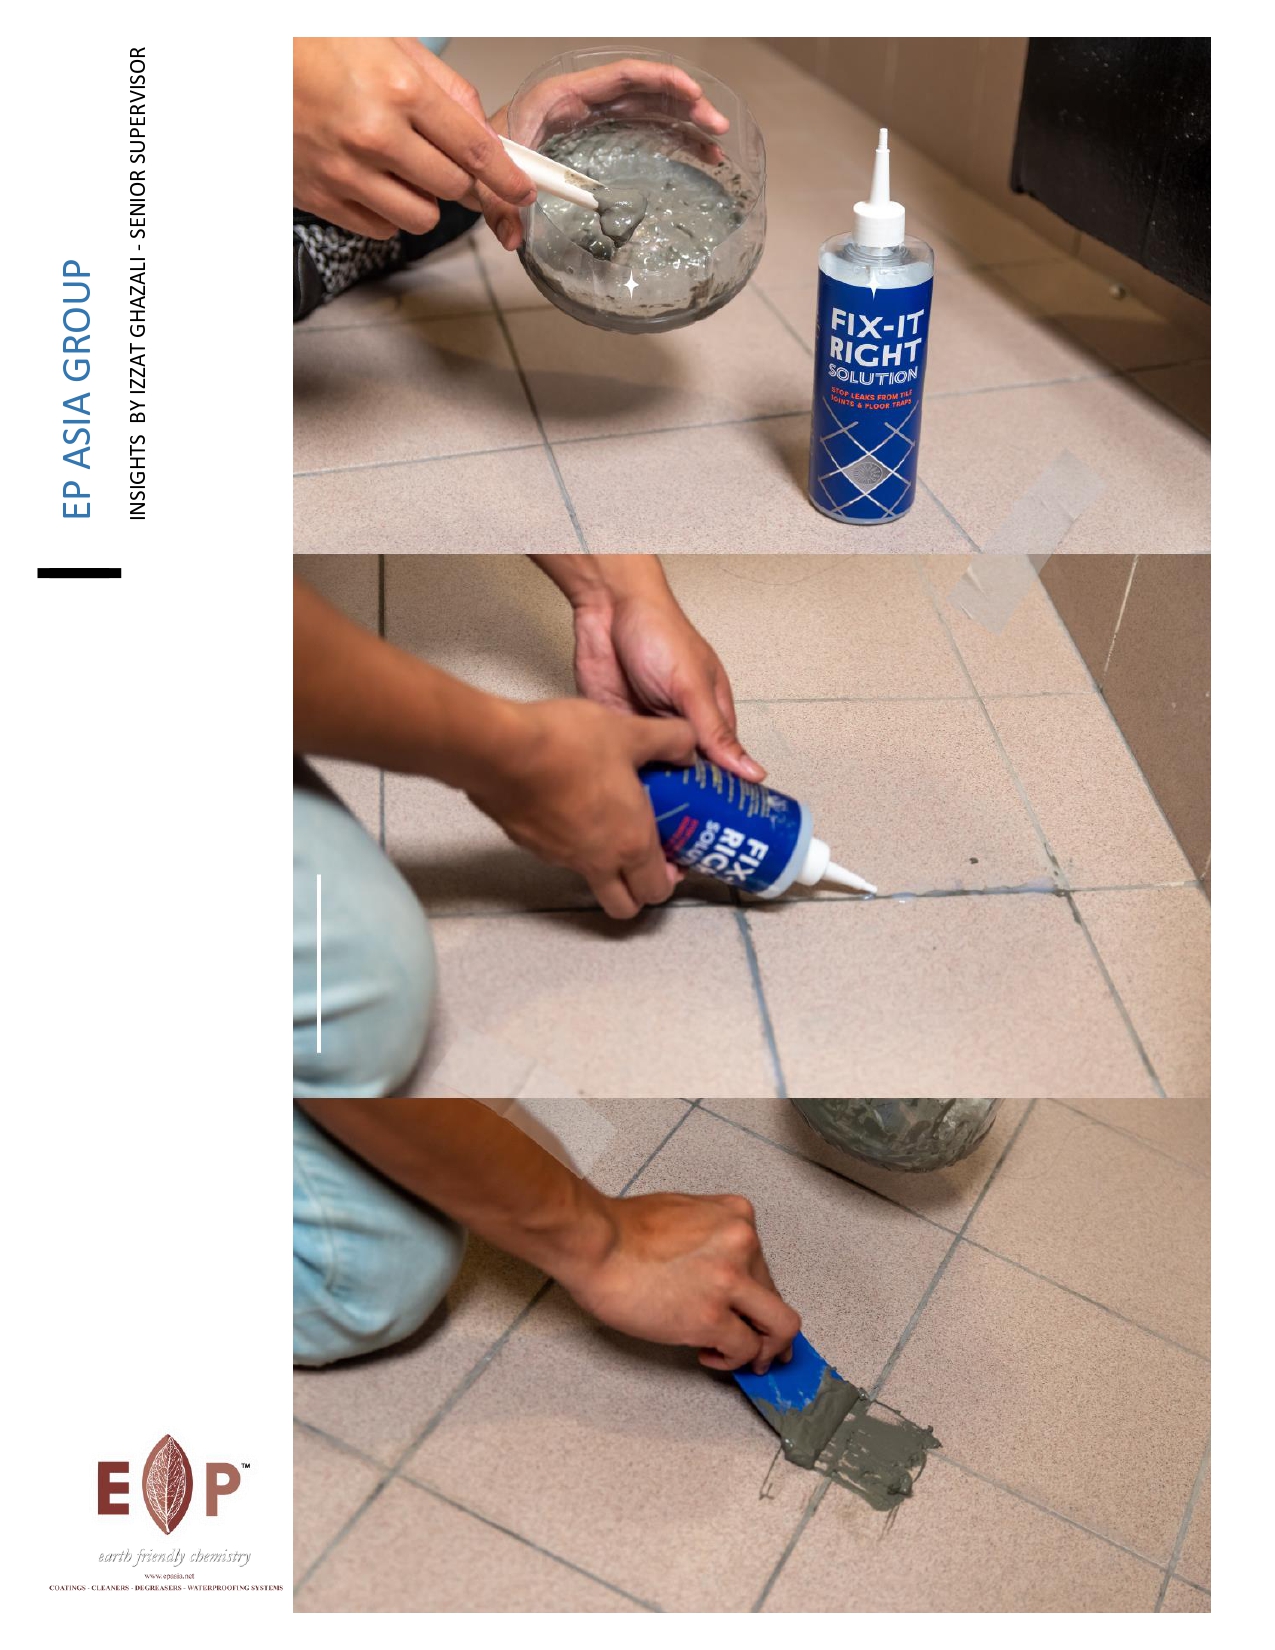
This Do-It Yourself solution offers a practical, long-lasting fix for bathroom leaks without the need for extensive renovations or tile removal. Take charge of your bathroom’s integrity with FIX-IT RIGHT SOLUTION.
Email EP Asia for more details info@epasia.net
TIP #1
Ensure the bathroom floor is dry before starting repair works. Do not use harsh chemicals to clean the floor before or after waterproofing works.
TIP #2
The three areas to check for leaks are the floor trap, all the tile joints for missing grouting and the 90-degree angle joints.
FIX-IT RIGHT SOLUTION is manufactured using polymer. It is a liquid Nano Waterproofing material. A 100% biodegradable product
Click link here for more https://epasia.net/fix-it-right-solution-2/
A Guide to Repairing Bathroom Leaks on Your Own: The Fix-It Right Solution
How to Spot Bathroom Leaks in High-Rise or Double-Storey Homes.
Living in a high-rise or double-storey home has its own set of challenges, particularly when dealing with bathroom leaks. These issues can manifest in unexpected ways, such as water stains on your neighbor’s ceiling, signaling a leak from your own bathroom or balcony. It’s essential to identify the source of these leaks, and we’ve got you covered with our latest article, where we’ve outlined key areas to check for bathroom leaks – Where to check for bathroom leaks.
Addressing the Root Cause: Waterproofing Repairs
Identifying problematic areas is the first step in determining the necessary repair work. In most cases, waterproofing is the key concern, as it plays a crucial role in preventing leaks. However, improper initial waterproofing can result in serious consequences.
Introducing FIX-IT RIGHT SOLUTION
FIX-IT RIGHT SOULTION is a simple and user-friendly solution that doesn’t require any tile hacking. Homeowners can now easily fix the issue themselves with our DIY kit that comes complete with all the necessary essentials. . The FIX-IT RIGHT SOLUTION is a unique waterproofing formula that dissolves into the grouting cement, forming a thermoplastic layer that effectively repels water, preventing it from seeping between tiles and waterproofing your bathroom floor.
Fixing Bathroom Leaks with FIX-IT RIGHT SOLUTION: A DIY Guide
Before starting any repairs, it is essential to ensure that the bathroom floor is entirely dry. Avoid attempting any fixes on wet or damp surfaces. Clean away any debris, moisture, or dirt.
Touch Up Missing Grouting and waterproofing
1) Pour some cement grouting into a plastic container and add FIX-IT RIGHT SOLUTION to it.
2) Mix the cement and solution thoroughly using a grouting tool until the cement is smooth.
3) Use the grouting tool to apply the cement to MISSING GROUTING and be sure to fix the floor trap making sure that the cement is forced into the joints.
4) Let the cement dry for 20-30 minutes. Use a damp sponge to clean up excess cement grouting from the tiles.1
5 ) To apply FIX-IT RIGHT SOLUTION (Waterproofing) to all the tile joints/
6) Leave to dry for 24 hours.
